Friday, October 28, 2011

Accessories from Vintage Ties (No Sew!)

The other day I was browsing through Goodwill on a hunt for a red and yellow striped tie for my son's Harry Potter Halloween costume.  I did not find one, but I did find a red one that I ended up painting yellow stripes on!  While digging around, several other vintage-y men's ties caught my eye because of their patterns, textures and colors.  I didn't know exactly what I was going to do with them, but knew that I wanted to try my hand at making some flowers for hair accessories.  At $1.37 a tie, it wasn't a huge investment to bring these home: 


Gathered some more supplies at a trip to Wal-Mart:  cheap headbands from the hair product section and alligator-type hair clips from the craft and bead department:


I started by ripping out the seam up the back of the tie.  Pretty easy work as many of the ties were a bit worn out!


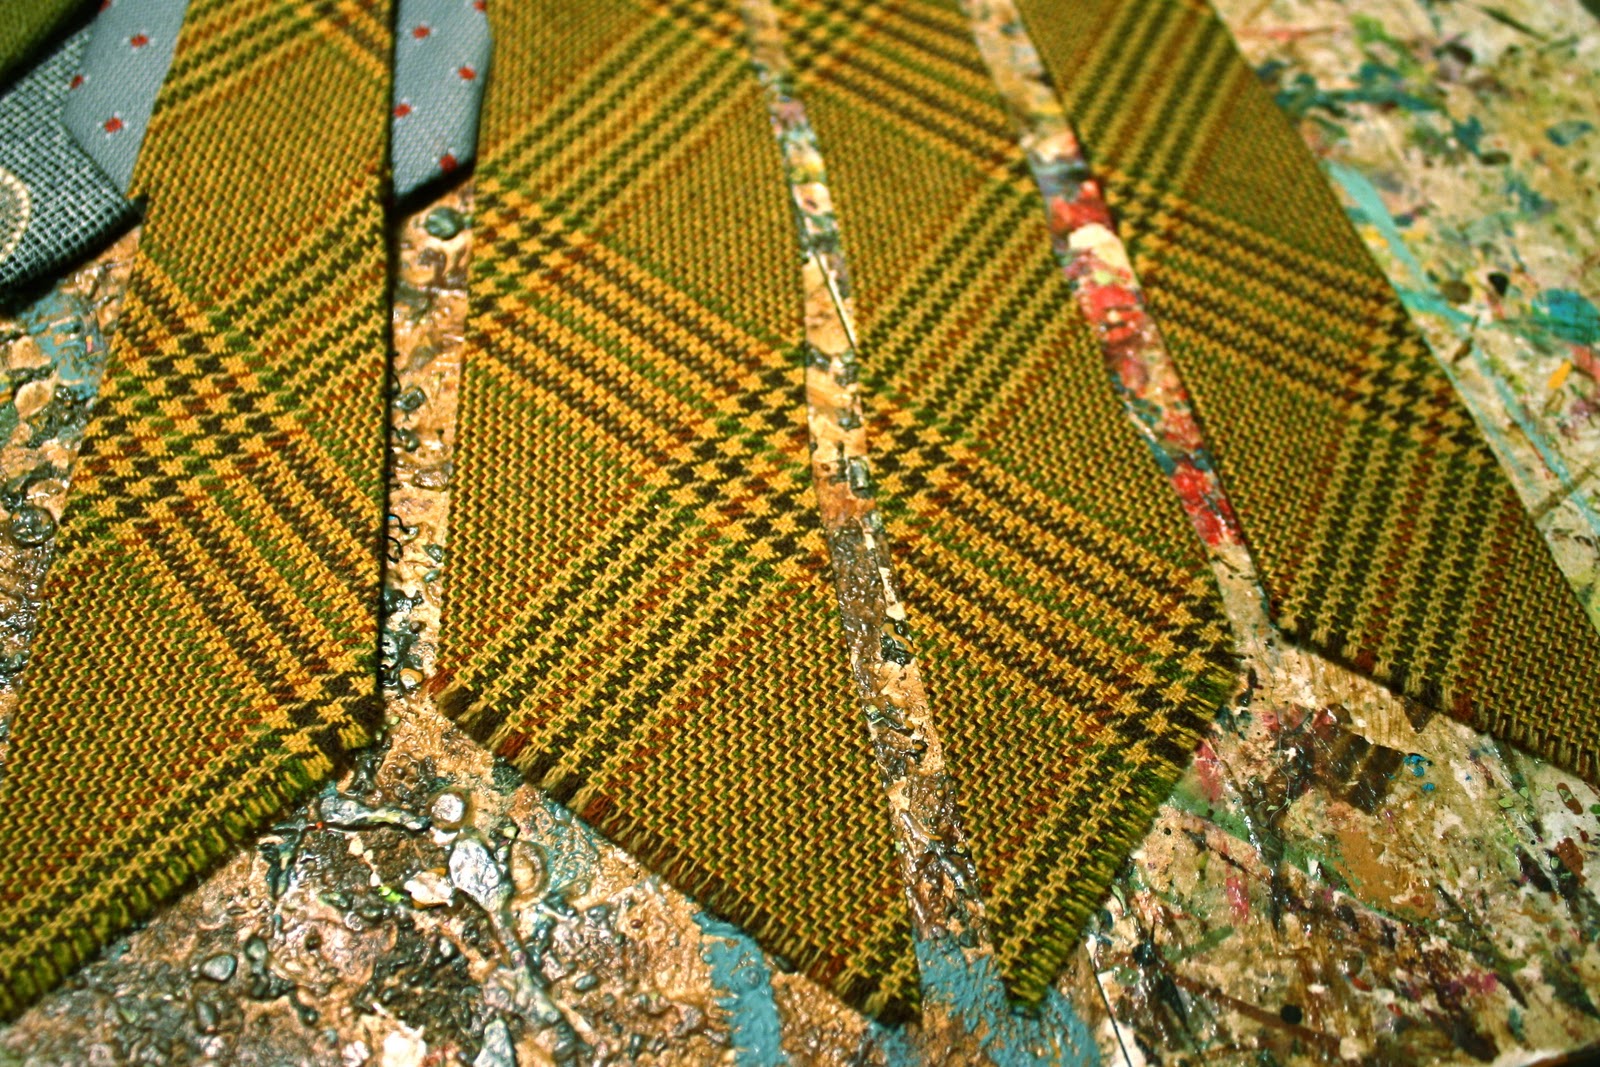
Once it was opened up, the inside lining removed and laid out flat, I realized I could easily divide the tie into 4 long strips of fabric, by cutting down the length on the creases and then cutting up the middle:

Cool!  I could get 4 flowers - at least - out of one tie!

Starting at the narrower end of one strip, I tied a knot:


And started wrapping the fabric around the knot, twisting the fabric and hot gluing as I went, until I ended up with the size flower I wanted:


Most of the flowers I made required less than one strip of fabric!   After making several flowers, it was time to move on to a headband.  The key to wrapping the headband was to start with two small strips of fabric cut as narrow as the headband to fold over and glue to the tips of each end.  Then it was just a matter of wrapping around, gluing as I went:


I tried my headband on in the mirror, to see exactly where I wanted to glue my flowers, then glued them on, off-centered:


ta-da!


ta-da!


I also made some single flower hair clips.   For me, the alligator type clip was crucial, because I also wanted to be able to use the flowers to accessorize my scarves:


Gluing the clip on required me to work quickly:  I laid down some glue, adhered the clip, but kept it open so that the other side didn't get caught in the glue, then laid down a scrap of fabric to cover the glued side of the clip.  It made a very strong bond!

ta-da!


I love that this same type of clip works with my scarves too!


I spied this plain leather cuff at Goodwill, and added a flower to it too!


After some more flower making, I ended up with one strip from each tie leftover.  This gave me the idea to combine them into a braid.  I googled how to braid with 4 strands and after some experimenting, figured out how to incorporate the braiding around a headband.  I know this picture is not great, but it gives you an idea of how I staggered the strips when I glued them on.  I also made sure to have two strips on one side and two on the other to start my braiding.


For this braided headband, I wanted a different kind of flower that incorporated all of the different fabrics that I'd used in the braid.  I gathered some scraps from the wider ends of the ties and hot glued little gathers:


until I had a rough circle:


Added a slightly smaller one from another fabric:

 
And then added an even smaller flower of the "knot, wrap and twist" variety from above:


Trimmed it up a bit, then glued to my braided headband:
 

Ta-da!


Lastly, I decided to try my hand at some 'feathers.'


They were too flimsy as is, so I hot glued a smaller piece of the tie lining to the backs of the feathers to make them stiffer:


Here's what I ended up with:


Now I have a nice new collection of hair accessories!


Geesh!  Now don't get carried away!  Maybe just one at a time:


I'm contemplating making more to sell, but it was a lot of farting around!  I'm hoping that now that I'm done with the thinking and experimenting phase, the next batch would go quicker!

Do you think people would buy them?  I've been wearing mine around town this week and have gotten several compliments!


*linking this project to Flamingo ToesBe Different...Act NormalWhipperberry and Tater Tots and Jello.

Monday, October 24, 2011

Inspiration

Here are some things that have been inspiring me lately:

Hedgeballs in our yard.  We gathered them into a bright green bucket.  There's just something about those competing greens...  


Centerpiece on our kitchen island.  Black and white really do look really great with any other color!  Especially teal green:


One of our very favorite places to get patterned paper is in the process of going out of business.  :-( 
(They're still looking for a buyer, if you know of anybody that's interested in owning a scrapbooking store!) We've been watching from week to week as their supplies dwindle and the deals get better.  Last week everything in the store went from 50 to 60% off, and so despite the fact that I really don't need more,  I found myself spending almost $40 in paper.  I'll let you do the math. 


A trip to Goodwill on a search for a red and yellow striped tie for my oldest's halloween costume resulted in all of these other oldies but goodies coming home with me.  At the time I wasn't sure what I was going to do with them, I was just inspired by the patterns and colors!  And at $1.37 a piece, it wasn't a huge risk.  But now I've got some ideas in the works:


I'll show you the results of my experiments later on this week!

What have you been inspired by lately?

Tuesday, October 18, 2011

Fall Colors

Fall doesn't last nearly long enough.  Maybe that's what makes it so special.    

The beautiful fall colors:
October 6
 Do you find the fall color palette inspiring your artwork, like I do?


The leaves are almost gone already.  Which always makes me sad:
October 18

 Have you turned your heat on yet where you live?  Our highs this week are in the 50s and 60s, which means it gets pretty chilly at night!  Stay warm!

Friday, October 14, 2011

Everything is alright in the end....


If it's not alright, it's not the end.

This is the message that someone out there needs to hear today.  Share it with someone who needs a little hope.

Tuesday, October 11, 2011

Mini Art Blocks


I scanned a few of my favorite new pieces and reduced them in size to make these little art blocks.  I added a unique painted border to each one and voila!  They're about 3 1/2x 4 inches. These minis were a big hit at our last art show and are now almost gone!  So I'll have to make more for our upcoming show in Des Moines! 


Thinking that some of these are going to end up on some pendants as well!

Tuesday, October 4, 2011

It's a Beautiful Day!


Right across the way from Green Girl's Welcome Wall is this chalkboard.  (She added the scallops to a plain chalkboard.  Because everything looks better with scallops.)  There's always a great message on her board to meet you where you are.  Literally.  This is in her entryway.  Such a warm vibe, the minute you step foot into her house! 

Now don't let today slip away from you!